Written by Krista Smith.
In Part 1 of this 4-part series, I confessed that after limping along for a couple of years, one day, I finally realized that something needed to change in my homeschool. I needed confidence and better daily systems in order to love, serve, and teach my kids well.
As with the previous posts, I have labeled the time it takes to do each part of this new step so you can see just how low-stakes it actually is. You have time for this, friend. Your simple efforts to get organized on the front end of the school year will eventually pay you back 10 times over. I promise!
In the 4th and final part of this series, I’ll go over STEPS 3 & 4 of the 4-step overlapping system which I think both you and your kids are going to love.
___________________________________________
 Krista Smith is blessed to be the mother of three beautiful children and is privileged to homeschool them using an eclectic variety of methods. She has a deep and abiding love for tan-colored coffee, spending time with her family, and seeing children find their forever homes through adoption. But above all of these things, Krista is, first and foremost, a lover and follower of Jesus Christ. So, may the Lord and His Gospel get every ounce of honor, glory, and credit for anything she writes, says, or does.
In Part 2, I shared why planning out some things in the homeschool day and setting them on autopilot can be life-giving and sanity-restoring, whether you use the particular methods I suggest or come up with brand new ones that work better for your unique family. I also walked through STEP 1 in the 4-step overlapping system I use to plan out everything from the yearly level to the daily level in my homeschool.
(This post contains affiliate links. Please see my disclosure policy for full details.)
Now, in Part 3 of this series, I'll introduce STEP 2 and I pray that when you’re done reading, you’ll be jumping in the car to raid your local Walmart of hanging file folders with a sweet sense of peace in your hearts!
Now, in Part 3 of this series, I'll introduce STEP 2 and I pray that when you’re done reading, you’ll be jumping in the car to raid your local Walmart of hanging file folders with a sweet sense of peace in your hearts!
As with the previous posts, I have labeled the time it takes to do each part of this new step so you can see just how low-stakes it actually is. You have time for this, friend. Your simple efforts to get organized on the front end of the school year will eventually pay you back 10 times over. I promise!
STEP 2 // FOLDERS:
Plan monthly using simple hanging file folders (Approximate time it takes: 30-60min./month)Once your year is planned (STEP 1), tackle the following details one month at a time.
Set a reminder for yourself
At the end of each month, put a reminder in your phone calendar (or physical calendar…or both if you’re anything like me), to alert you that it’s time for your monthly evening of homeschool planning and prep. Evening. Singular. I usually check the calendar and schedule my planning for the last Friday or Saturday night of the month. That way, I’m all set and ready to go when the new month rolls around!Prep a month's worth of pages
Using that handy planner you filled out during the summer months, look through your curricula for each child and make enough photocopies or tear out enough workbook pages for ONLY the next month (30 days).File the month away
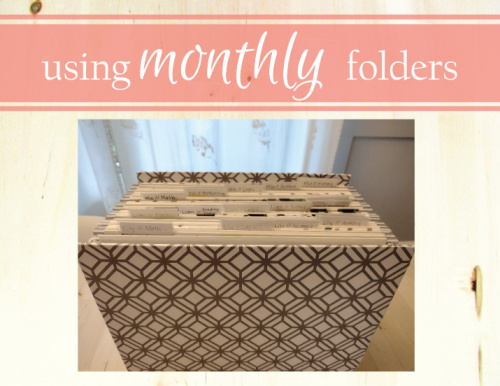
Place these sheets in a labeled hanging file folder that you have pre-labeled. (You'll need a separate hanging file for each of the subjects that each of your children is learning.)I bought a cheap but cute hanging file box with a lid into which I store a month’s worth of printable school pages. It was super affordable and has become one of the things I don’t think I could homeschool without. If my house were on fire I would save the file box and let all the craft supplies burn, even the glitter. Especially the glitter.
Jot yourself some notes
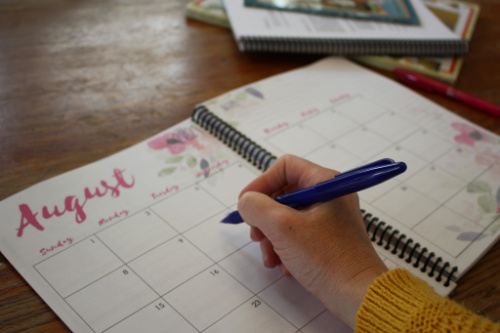
Next, with the homeschool planner you've been using since STEP 2 in hand, begin looking through content-rich subjects like history, geography, and science. If you’re using the Brave Homeschool Planner you’ll see at the start of every month, a two-page-spread calendar with a generous “Notes” section on the right-hand side. Into the “Notes” section, jot down things like:
- books you may need from the library for that subject
- craft/laboratory items you’ll need to purchase for just the next 30-day period
- and references to any subject-appropriate YouTube videos or films you’ll be showing your kids in the coming month
There is also another small “Notes” section on each of the weekly sheets as well, into which you can write down notes to remember for that particular week. I write things like, “Remember giant squid YouTube vid for Thursday!” into these sections.
Science projects, documentaries, and subject-themed crafts are the jazz hands of homeschooling. For years, however, I never had the time or the mental energy to try to do any of these extras because I was struggling to just get to the mundane required parts of the school day.
Science projects, documentaries, and subject-themed crafts are the jazz hands of homeschooling. For years, however, I never had the time or the mental energy to try to do any of these extras because I was struggling to just get to the mundane required parts of the school day.
Now, with so much of our homeschool on autopilot, I get to take a few precious minutes just once a month to put some videos in a folder on my YouTube account. (Yes! You can do that! I usually vet them while making my photocopies for the month and then rest easy knowing I have good, safe videos at my disposal for the next few weeks.)
I get to be fully present and unflustered when it comes time to do the lab we were all excited for because I know I have everything I need for it purchased and in the cupboard.
Putting it all together
You’ve now got your planner (STEP 1) giving you gentle handrails and guidance in the direction you need to go. You’ve got your monthly folders (STEP 2) stocked with photocopies or lessons. You’ve made notes for and picked up your books from the library for those interesting science and history subjects you’ll be delving into for the month. You’ve purchased all the things you need for that science lab next Tuesday. You're all set to have a successful month of learning and it only took you 30 minutes to prep!In the 4th and final part of this series, I’ll go over STEPS 3 & 4 of the 4-step overlapping system which I think both you and your kids are going to love.
Organizing Your Homeschool Year Series
___________________________________________
 Krista Smith is blessed to be the mother of three beautiful children and is privileged to homeschool them using an eclectic variety of methods. She has a deep and abiding love for tan-colored coffee, spending time with her family, and seeing children find their forever homes through adoption. But above all of these things, Krista is, first and foremost, a lover and follower of Jesus Christ. So, may the Lord and His Gospel get every ounce of honor, glory, and credit for anything she writes, says, or does.

No comments:
Post a Comment