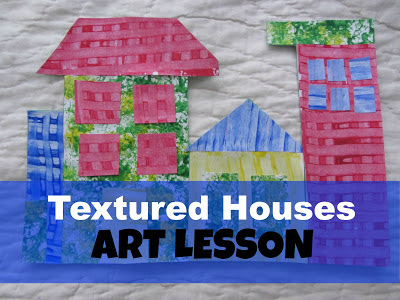
I love it when an art project is simple BUT also offers a lesson in art technique and/or art vocabulary. When we made these colorful house murals, we focused on TEXTURE.
This project is best done in two parts to allow for the paint to dry completely. Since we have art once a week, we PAINTED on the first week, and ASSEMBLED on the second.
To Make a Textured House Mural
You will need:
- one large piece of art paper cut into 3-4 sections
- 3-4 paint colors
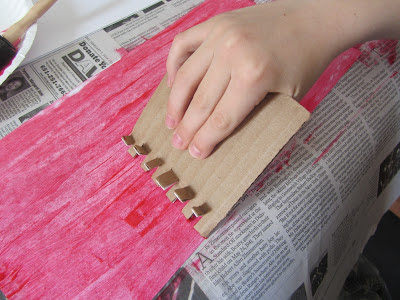
- a small square of thick cardboard that has been "toothed"
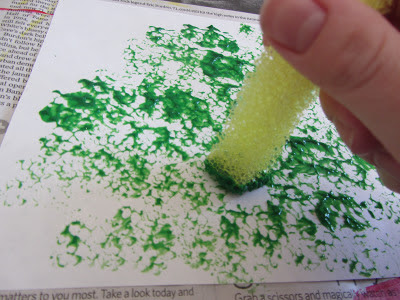
- a section of sponge
- a large paint brush or sponge brush
- a glue stick
- one piece of colored construction paper for assembly (not pictured here)
- scissors (not pictured)
Directions for Day One:
Using a large paint brush or sponge brush, generously paint an entire section of paper.
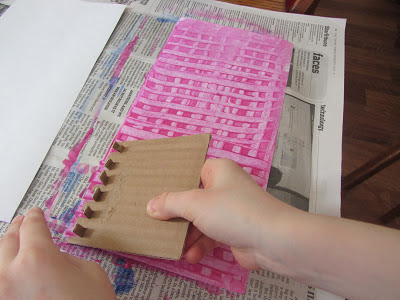
Before the paint has time to dry, use the "toothed" cardboard to scrape horizontal lines through the paint.
With a different color of paint, repeat these steps for another section of paper. Make both horizontal AND vertical lines with the "toothed" cardboard.
Use the sponge to dab color onto a third section of paper. This one actually looks better if two complimenting colors are dabbed on together.
Allow the sections to dry completely.
Directions for Day Two:
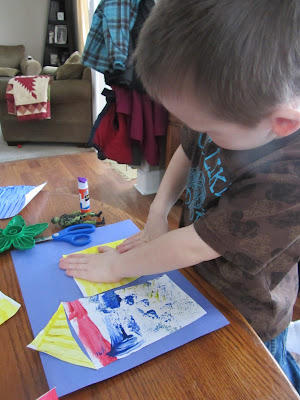
Cut house shapes (squares and rectangles) out of each section of paper. Glue them onto the colored construction paper taking care to glue the bottom of each house at the bottom edge of the construction paper. (When doing this project with young children, the COLORED construction paper helps them to see the edges of the paper better than just plain white.)
Create and glue on other houses of varying sizes. Each house should touch the sides of the house next to it so that you can not see the construction paper between them.
After gluing on three or four houses, cut out the perimeter of the houses and discard the leftover construction paper.
If the textured papers begin to curl or does not appear to be sticking to the construction paper very well, place a few heavy books on top of the completed mural just long enough to allow the glue to completely dry.
And what was my LITTLEST tot doing during our art time??...
(Don't worry, they were all perfectly sealed bottles.)







I just pinned this! It's great for all ages and different projects! Thank you for the inspiration!
ReplyDeleteI also wanted to say that I am a new follower, but I'm afraid that I am a word verification flunkie and since it normally takes me at least two tries to post a comment, I may not comment much after this! :( but will still read and pin as I can!
ReplyDeleteDon't sweat it! I'm just glad you're here!
DeleteSuper fun idea (as usual)! The last picture is adorable. I'm looking forward to having a little "paint bottle eater in footy pjs" again (but mine is of the pink variety). :)
ReplyDeleteYes I know. I was so excited to read that on your blog! How exciting!!! Can't wait to see pics. Hope she has your oldest daughters pretty hair.
DeleteGreat job, It’s posts like this that keep me coming back and checking this blog regularly, thanks for the info! Pisos en Pedralbes barcelona
ReplyDeleteYou created some decent points there. I looked over the internet to the problem and located most people goes along with along with your web site. Obra nueva Barcelona
ReplyDeleteWould you mind basically if I cite a couple of your discussions given that I deliver you credit as well as article sources returning to your webblog? My web portal is in the identical market as your site and my prospects would definitely use some of the advice you actually present at this website. Please let me know if this is okay with you. Adios for now! pisos lujo barcelona
ReplyDeleteA great content material as well as great layout. Your website deserves all of the positive feedback it’s been getting. I will be back soon for further quality contents. venta de casas
ReplyDelete